Menu
Your Cart

3 POINTS INSIDE MICROMETER 50-63MM 0.005MM ACC. 0.005MM GRAD.

3 POINTS INSIDE MICROMETER 50-63MM 0.005MM ACC. 0.005MM GRAD.
Out Of Stock
3 POINTS INSIDE MICROMETER 50-63MM 0.005MM ACC. 0.005MM GRAD.
PACK SIZE
The price displayed for this product is the unit price of the product. Where a PACK SIZE is indicated, this refers to the recommended ordering quantity and is also indicative of how many of these products are packaged in a box.
  • Stock: Out Of Stock
  • Model: AC362-010-01
  • Weight: 3.22kg
  • Pack Dim: 250.00mm x 185.00mm x 130.00mm
  • UPC: 6009515893514
Price:
R 16,814.73
Ex VAT: R 14,621.50

Available Options

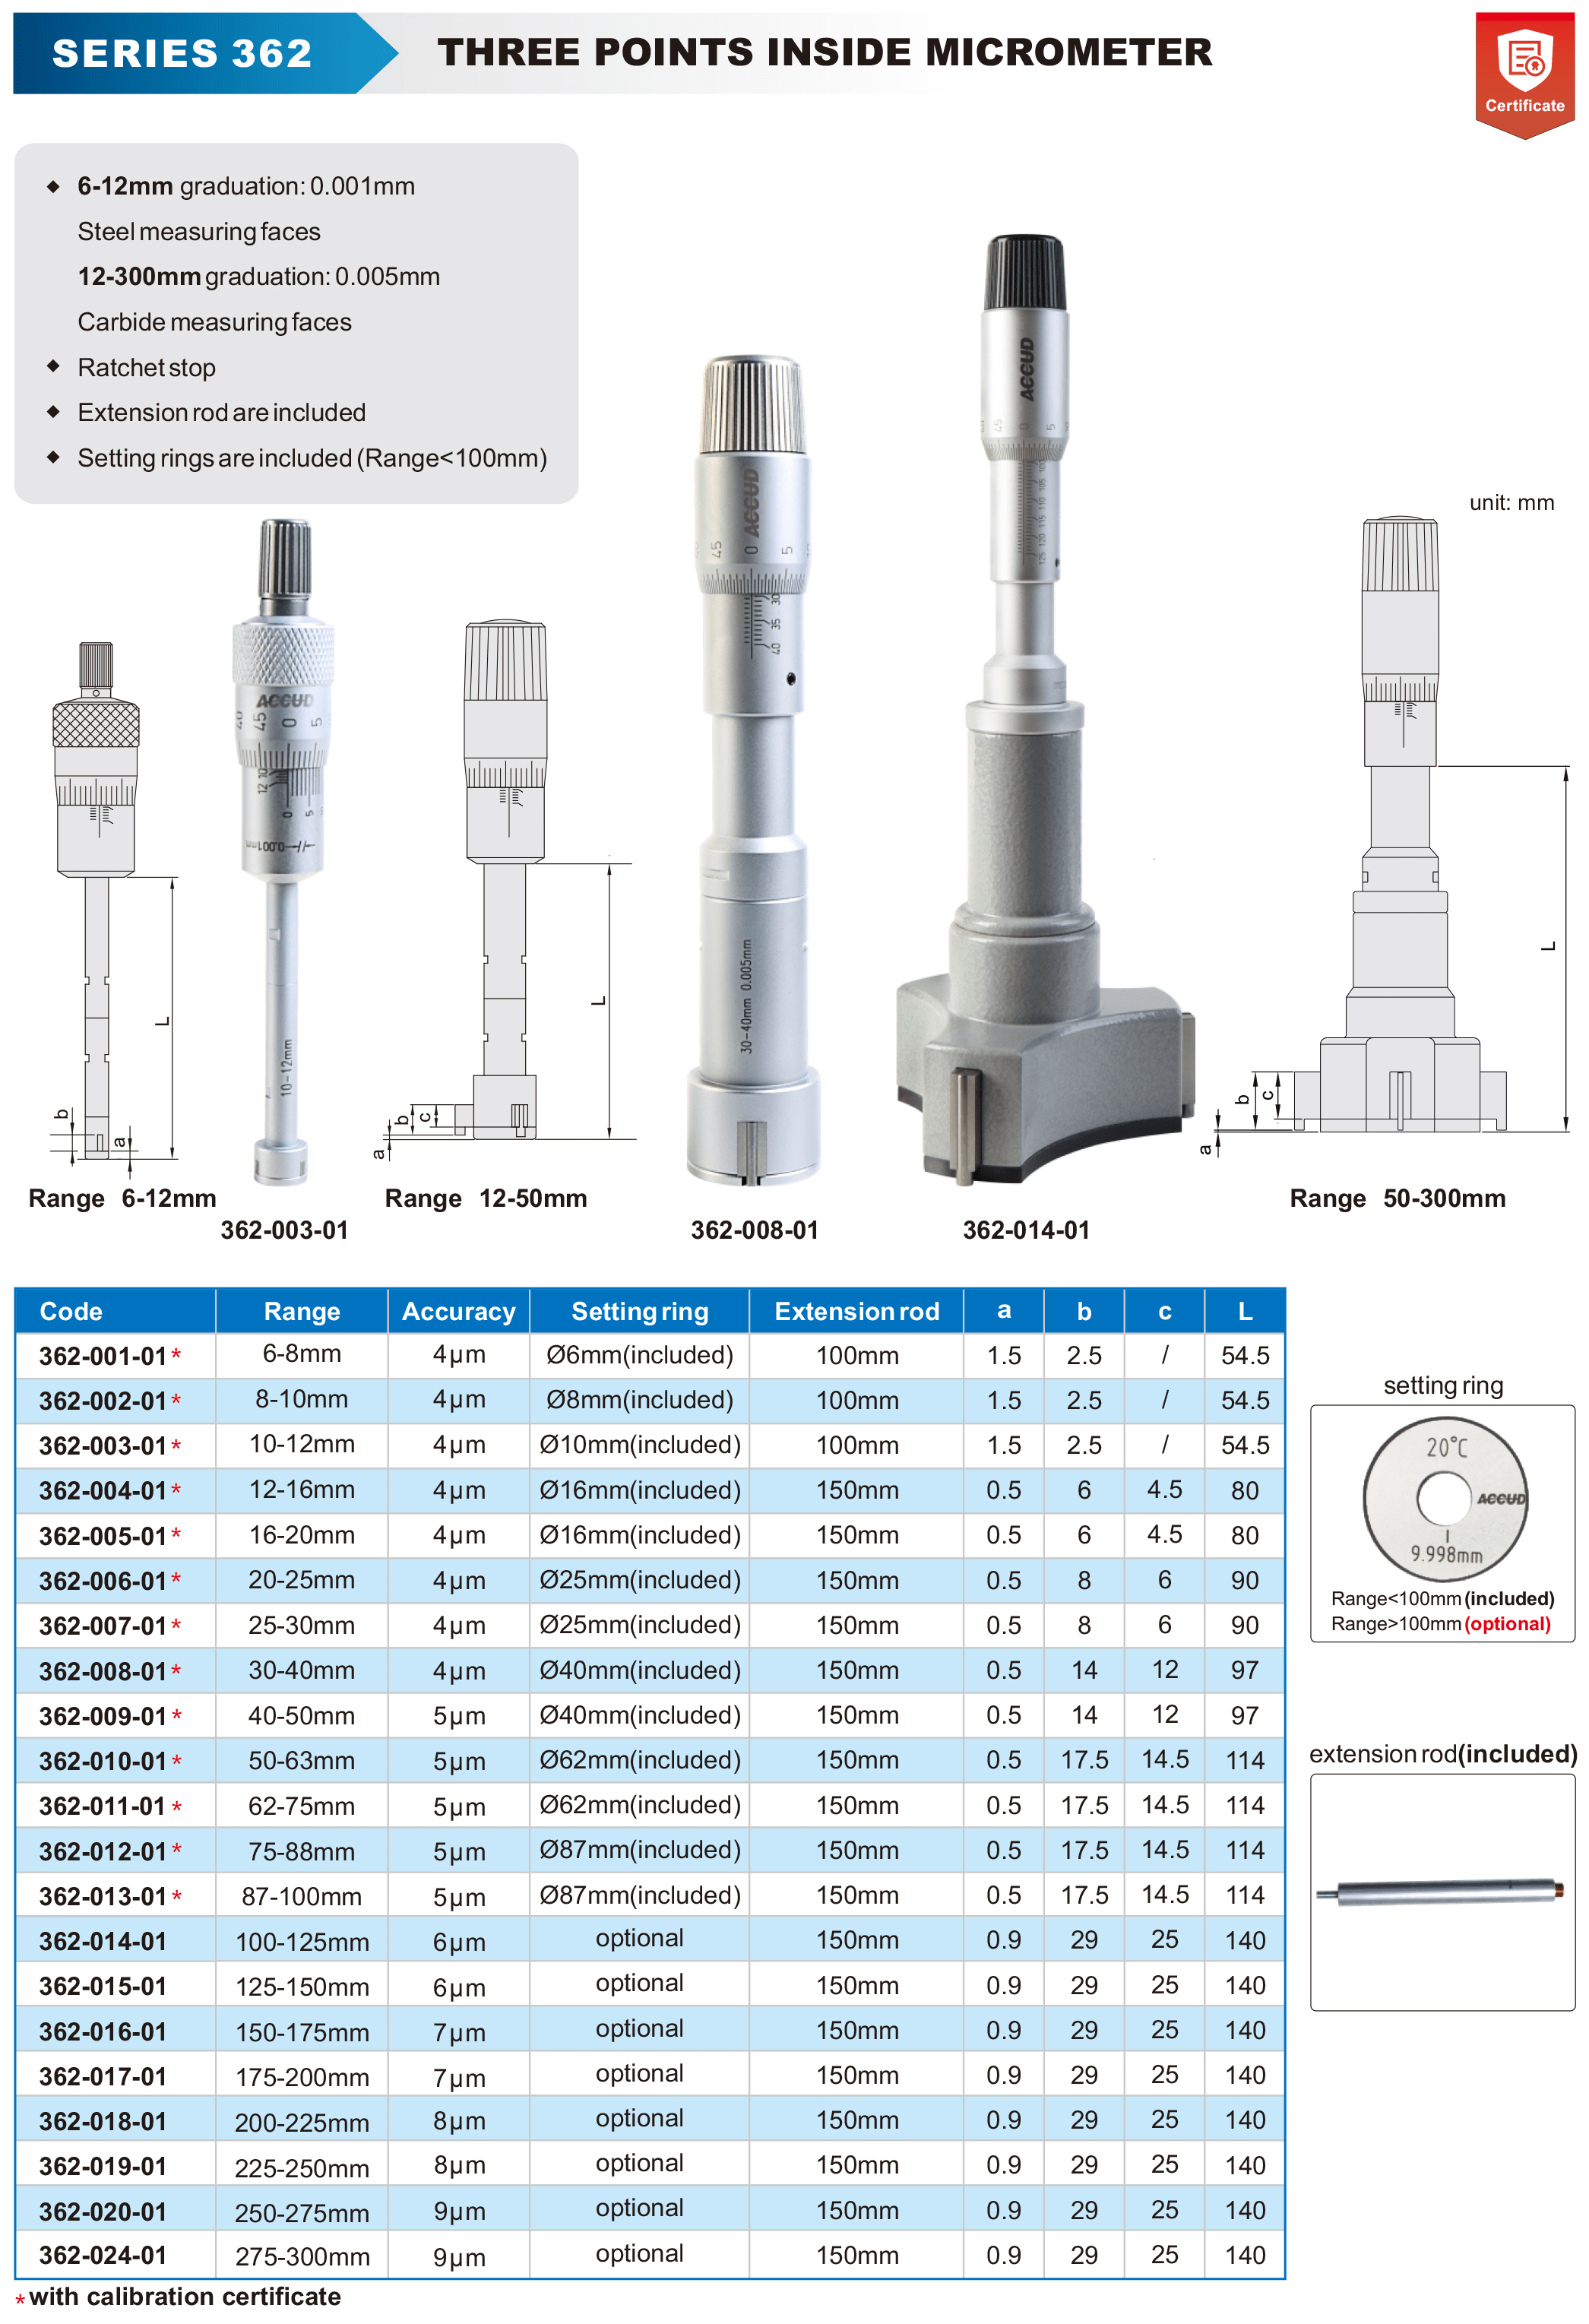
3 Point Inside Micrometer 50mm - 63mm
SERIES 362

A precision measuring instrument designed to measure the internal diameter of bores, cylinders, and other similar features with high accuracy. This tool is commonly used in engineering, machining, and quality control to ensure that internal dimensions meet specified tolerances. Unlike traditional inside micrometers, the three-point contact system allows for more stable and reliable measurements, particularly in larger bores.

SERIES 362

  • 6-12mm graduation: 0.001mm
    Steel measuring faces
    12-300mm graduation: 0.005mm
    Carbide measuring faces
  • Ratchet stop
  • Extension rod are included
  • Setting rings are included (Range < 100mm)

How it works:

  • Three-point contact: The micrometer has three measuring points that evenly distribute pressure on the inner surface of the hole, ensuring accurate and repeatable measurements.
  • Digital display: The measured diameter is displayed digitally, eliminating the need for manual reading and reducing the possibility of errors.
  • Extension rods: These can be used to measure deeper holes.

Applications

  • Machining and Metalworking: Used to measure the internal diameters of bores and holes in metal components, ensuring that they meet the required specifications.
  • Quality Control: Essential in inspection processes to verify the accuracy of internal dimensions in manufactured parts.
  • Engineering: Applied in various engineering tasks where precise internal measurements are critical, such as in the design and fabrication of mechanical parts.
  • Automotive and Aerospace Industries: Used for measuring the internal diameters of engine cylinders, bearing races, and other critical components that require precise tolerances.

Advantages of Three-Point Micrometers:

  • Improved accuracy: Ensures precise centering and measurement compared to two-point micrometers.
  • Reduced measurement error: Minimizes the impact of bore irregularities.
  • Suitable for various shapes: Can be used for both cylindrical and irregular bores.

Usage Procedure

  1. Select the Appropriate Measuring Head: If the micrometer comes with interchangeable heads, choose the one that matches the range of the bore to be measured.
  2. Zero the Micrometer: Set the micrometer to zero using a calibrated ring gauge or setting standard.
  3. Insert into the Bore: Carefully insert the measuring head into the bore, ensuring that the three-point contacts are aligned with the bore&s axis.
  4. Expand the Measuring Points: Use the thimble to gently expand the measuring points until they make firm contact with the bore walls.
  5. Read the Measurement: Observe the scale for the internal diameter measurement. Ensure that the micrometer is properly centered in the bore for an accurate reading.

Technical Specifications

Cookie Notice:
We Use Cookies... In addition to the cookies that are strictly necessary for the operation of this website, Vermont Sales uses cookies and other tracking tools to remember your preferences and to measure our website performance. Rest assured, your information is safe with us and we will NEVER share it with any other party. Privacy Policy